Create Verifier Template
A verifier template (shown as Receive credential configuration in the UI) defines which credentials you want to receive from a customer in a single verification flow. You can create a different template for each use case.
Assume you want to onboard a new customer. For your Know Your Customer (KYC) use case, you need to receive credentials to prove:
- The Deed of Incorporation of the customer
- The LPID of the customer
- The Tax Registration Statement of the customer
What is a verifier template?
A verifier template is the configuration that defines which credentials, and which attributes of those credentials, you want to receive from a customer in a single verification flow. You create one template per use case - for example, one for KYC onboarding and a different one for a mortgage application - and reference it by key when you start a verification request.
Open the verifier templates list
- Open Settings.
- Under Verifier, select Templates.
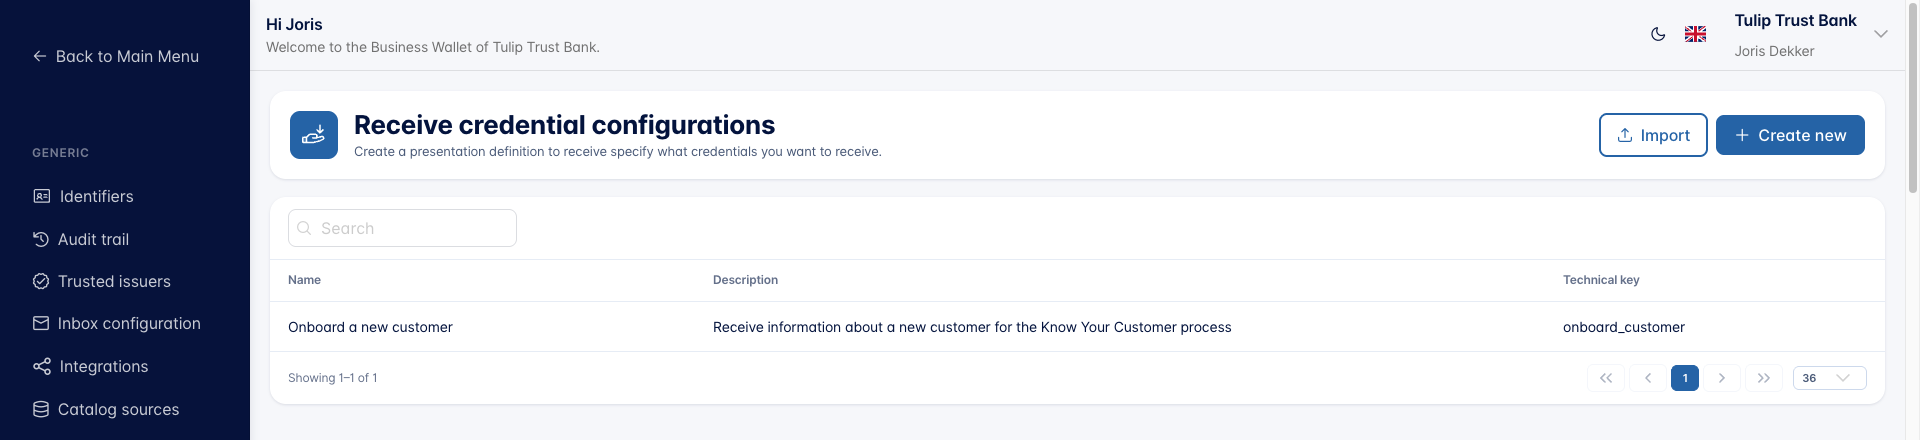
The table lists the existing templates with their Name, Description, and Technical key. Use the Search box above the table to filter the list by name, description, or technical key.
From here you can:
- Create new: start from a blank template
- Import: import a verifier template that was previously exported
Click a row to open and edit an existing template.
Verifier template form
A verifier template is grouped into four sections: Technical details, Technical configuration, Policies, and Configure Credentials.
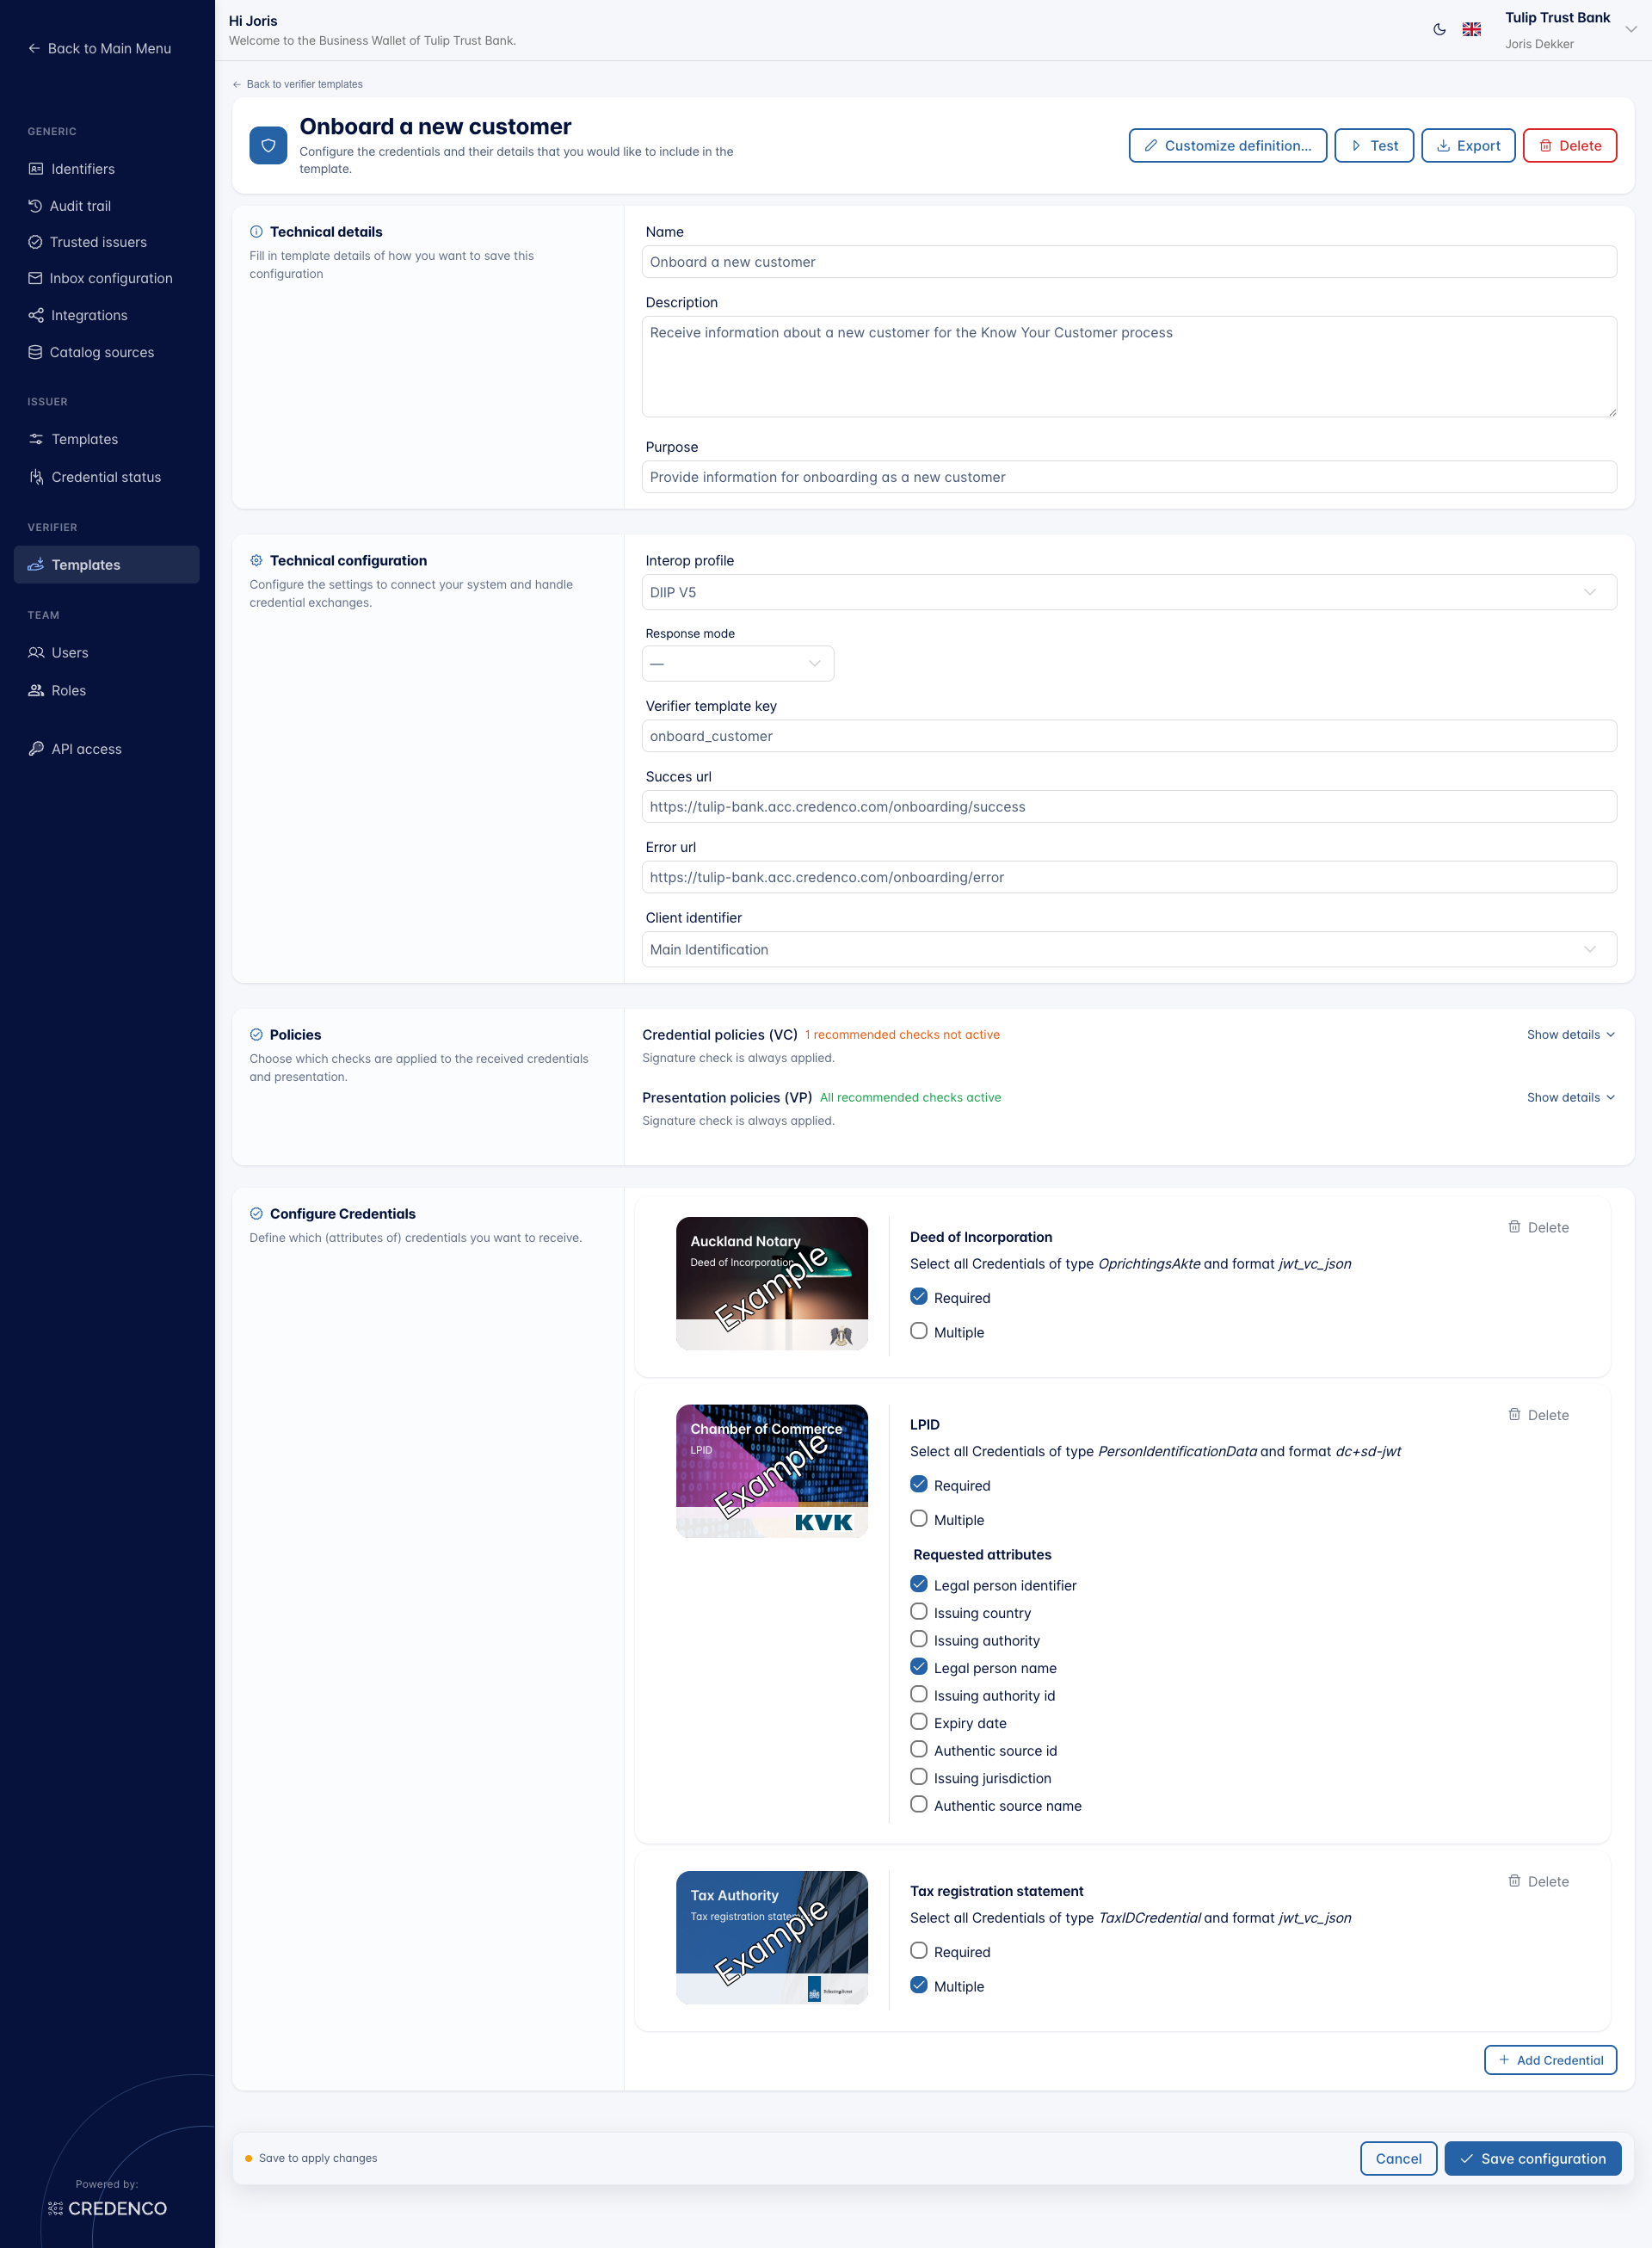
The top-right actions let you switch the template to a custom definition with Customize definition…, Test the template, Export it to JSON, or Delete it.
Technical details
Describe what this template is for. These fields are only used in the UI and in the consent screen shown to the wallet user.
- Name (required): A logical name of the configuration.
- Description: A short description that helps you find the template later.
- Purpose (required): The text shown to the wallet user explaining why you are asking for the credential(s).
Technical configuration
Configure the protocol details used during the credential exchange.
-
Interop profile (required): The interoperability profile that defines the protocol versions used between the verifier and the wallet. Pick from:
DIIP V3DIIP V4DIIP V5HAIP
See the DIIP specification for details on the DIIP profiles, or the OpenID4VC High Assurance Interoperability Profile for HAIP.
-
Response mode (optional): How the wallet sends its answer back. Leave this empty to let the calling application decide. Choose
direct_post.jwtwhen the wallet requires an encrypted response; some wallets, such as France Identité, refuse to answer otherwise. -
Verifier template key (required): A unique key for this template. Pass this key to the Universal OIDC4VP API to identify which template to use.
-
Success URL (required): The URL the user is navigated to after the credential(s) are successfully received.
-
Error URL (required): The URL the user is navigated to when something went wrong receiving the credential(s).
-
Client identifier (required): The identifier used to authenticate the verifier to the wallet. Pick one of the identifiers configured under Settings → Identifiers.
noteOnly DID and X.509 identifiers can be used as a client identifier. JWK identifiers are not supported.
Policies
The Policies section decides which checks are applied to the credentials and the presentation you receive. Checks marked Recommended are switched on by default.
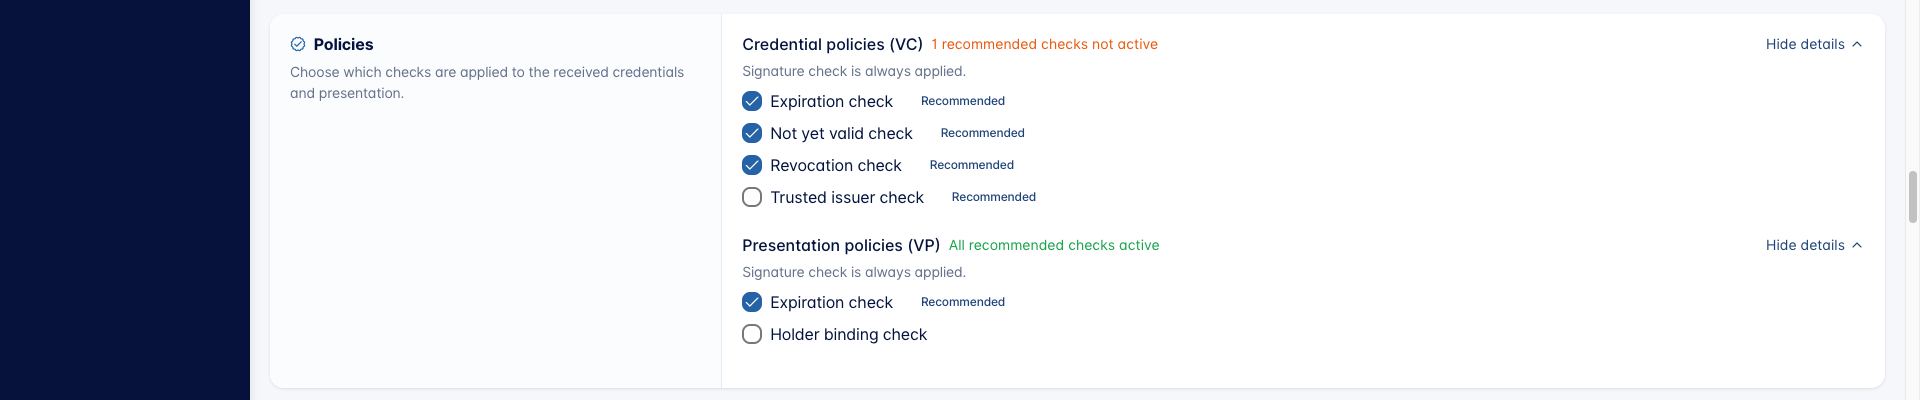
Each group shows a summary, either "All recommended checks active" or "N recommended checks not active". Click Show details to open a group and change the individual checks.
The signature check is always applied to both the credential and the presentation. It cannot be switched off.
Credential policies (VC)
Checks applied to each individual credential you receive.
- Expiration check (recommended): Checks that the credential has not expired based on its validity date.
- Not yet valid check (recommended): Checks that the credential is already valid and not dated in the future.
- Revocation check (recommended): Checks that the credential has not been revoked by the issuer.
- Trusted issuer check (recommended): Checks that the credential's issuer is on the list of trusted issuers. Maintain that list under Settings → Trusted issuers.
Presentation policies (VP)
Checks applied to the presentation as a whole.
- Expiration check (recommended): Checks that the presentation has not expired.
- Holder binding check: Checks that the presentation was submitted by the same party the credential was issued to.
Configure Credentials
The Configure Credentials section lists every credential the template requests. Click Add Credential to add one.
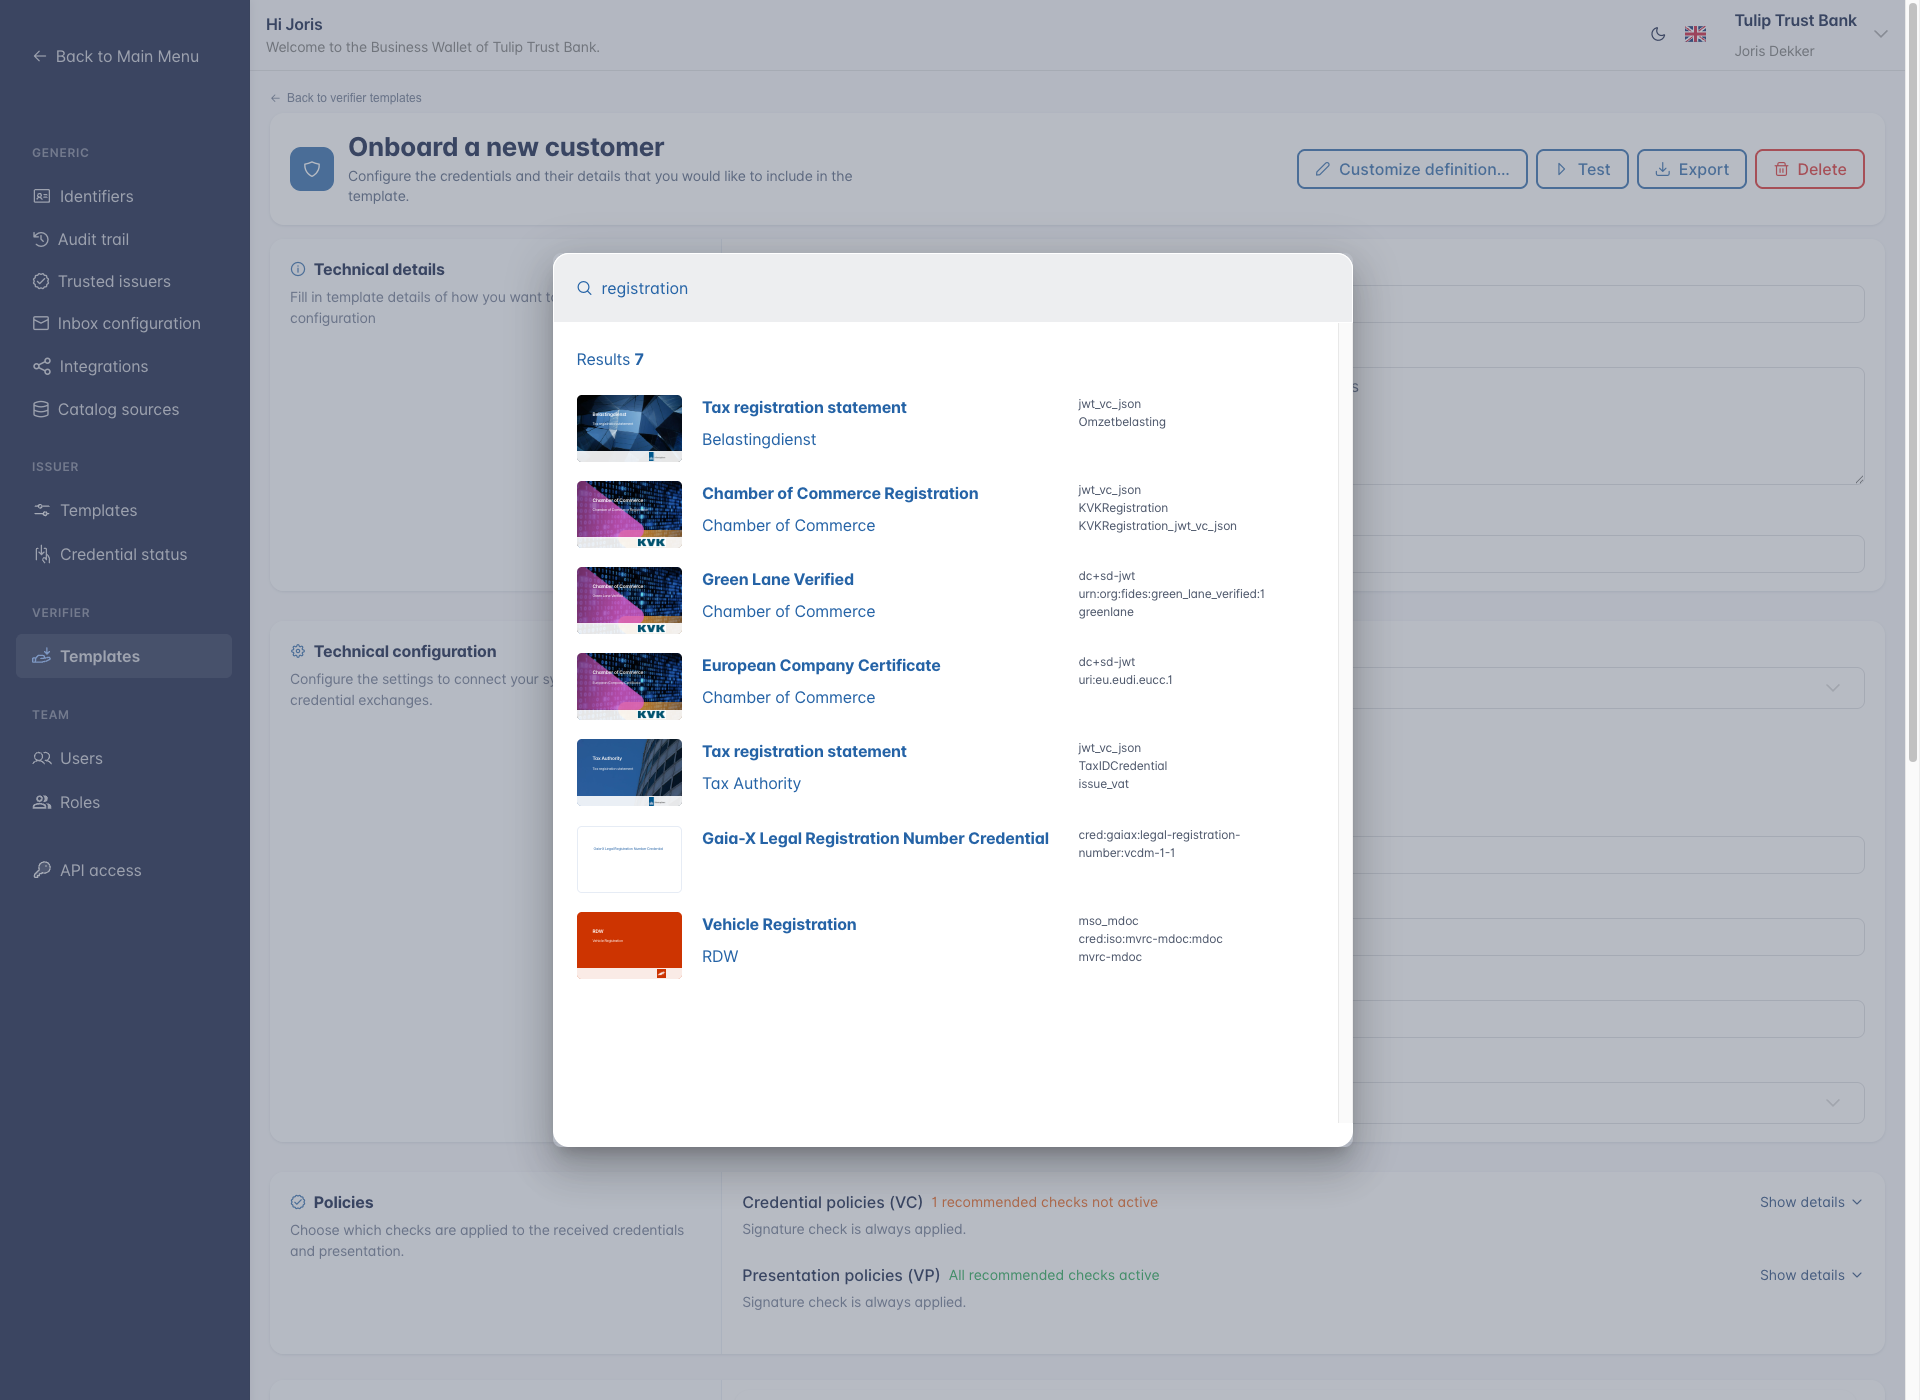
Search the catalogue and pick a credential. Each credential you add gets its own card showing the issuer, the credential name, and which credentials it matches, for example "Select all Credentials of type OprichtingsAkte and format jwt_vc_json".
For each credential you can configure:
- Required: Whether the customer must provide a credential of this type. When not set, the credential is optional.
- Multiple: Whether the customer may provide multiple credentials of this type (for example, multiple
Diplomacredentials). When not set, only one credential of this type can be provided. - Requested attributes: For credential formats that support selective disclosure, pick which attributes you want to receive. Attributes not selected may still be provided but are optional.
Use the Delete button on a credential card to remove it from the template.
Edit the presentation definition directly
The visual builder covers most use cases. When you need something it cannot express, click Customize definition… in the top-right of the form and confirm.

The Configure Credentials section is then replaced by a presentation-definition.json editor. The editor shows whether the document is currently Valid JSON or Invalid JSON.
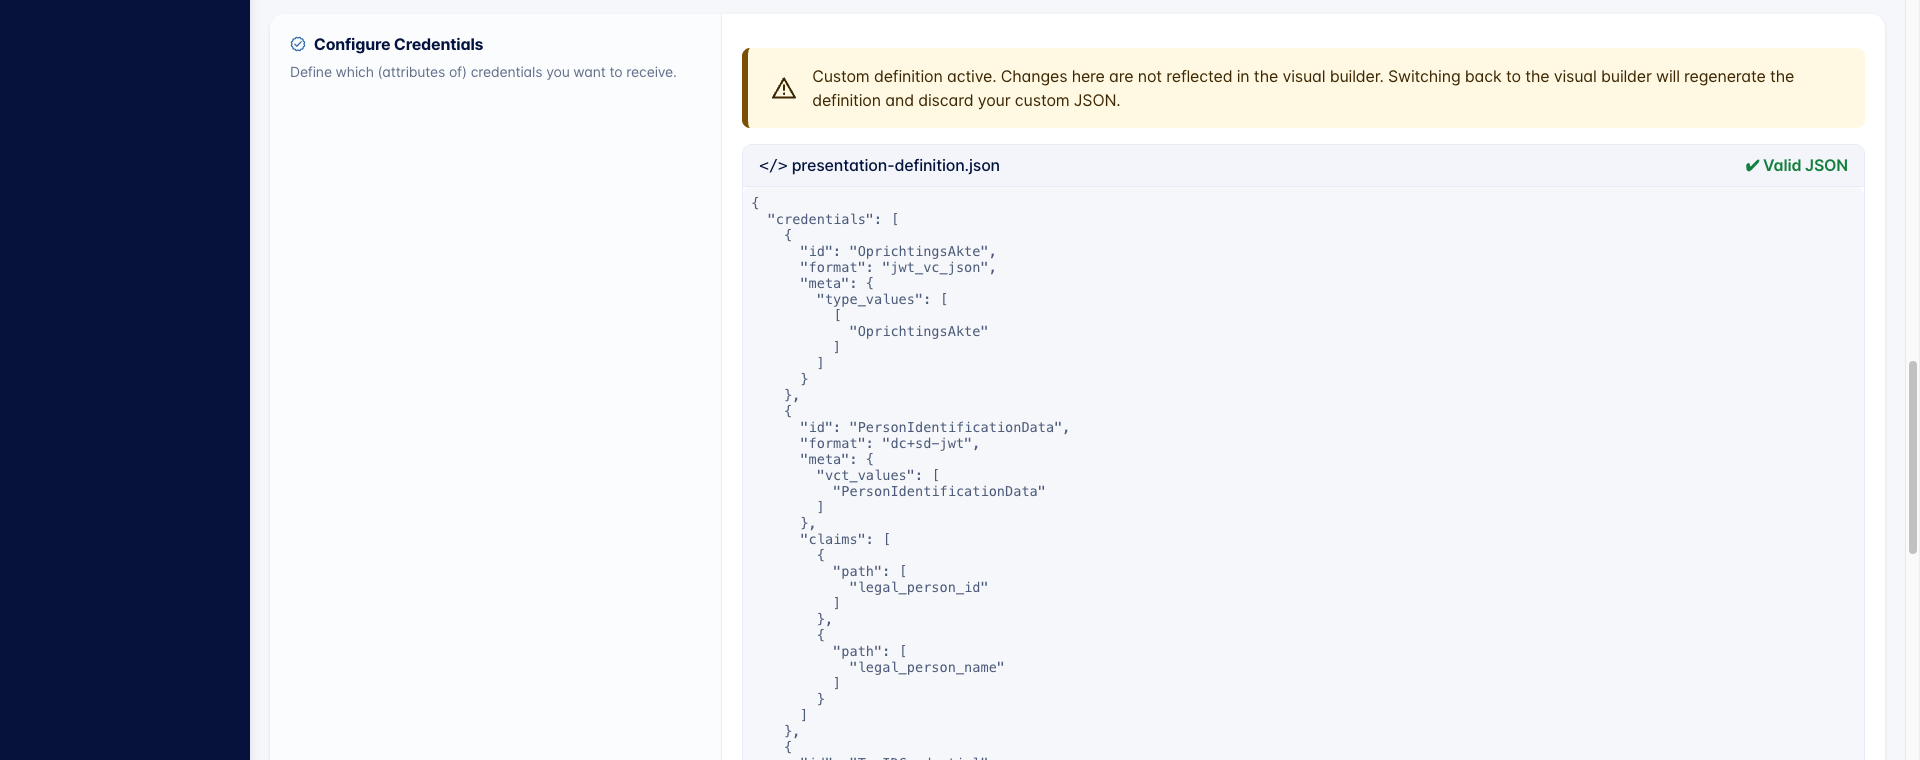
While a custom definition is active, the top-right button changes to Use visual builder….
Switching back to the visual builder regenerates the presentation definition from the selected credentials and discards your custom JSON when you save. This cannot be undone.
Save
Click Save configuration at the bottom of the form to apply your changes, or Cancel to discard them. A "Save to apply changes" hint appears when you have unsaved edits.
Test the template
Once the template is saved, use Test in the top-right of the form to run a real verification request against it, without writing any code.
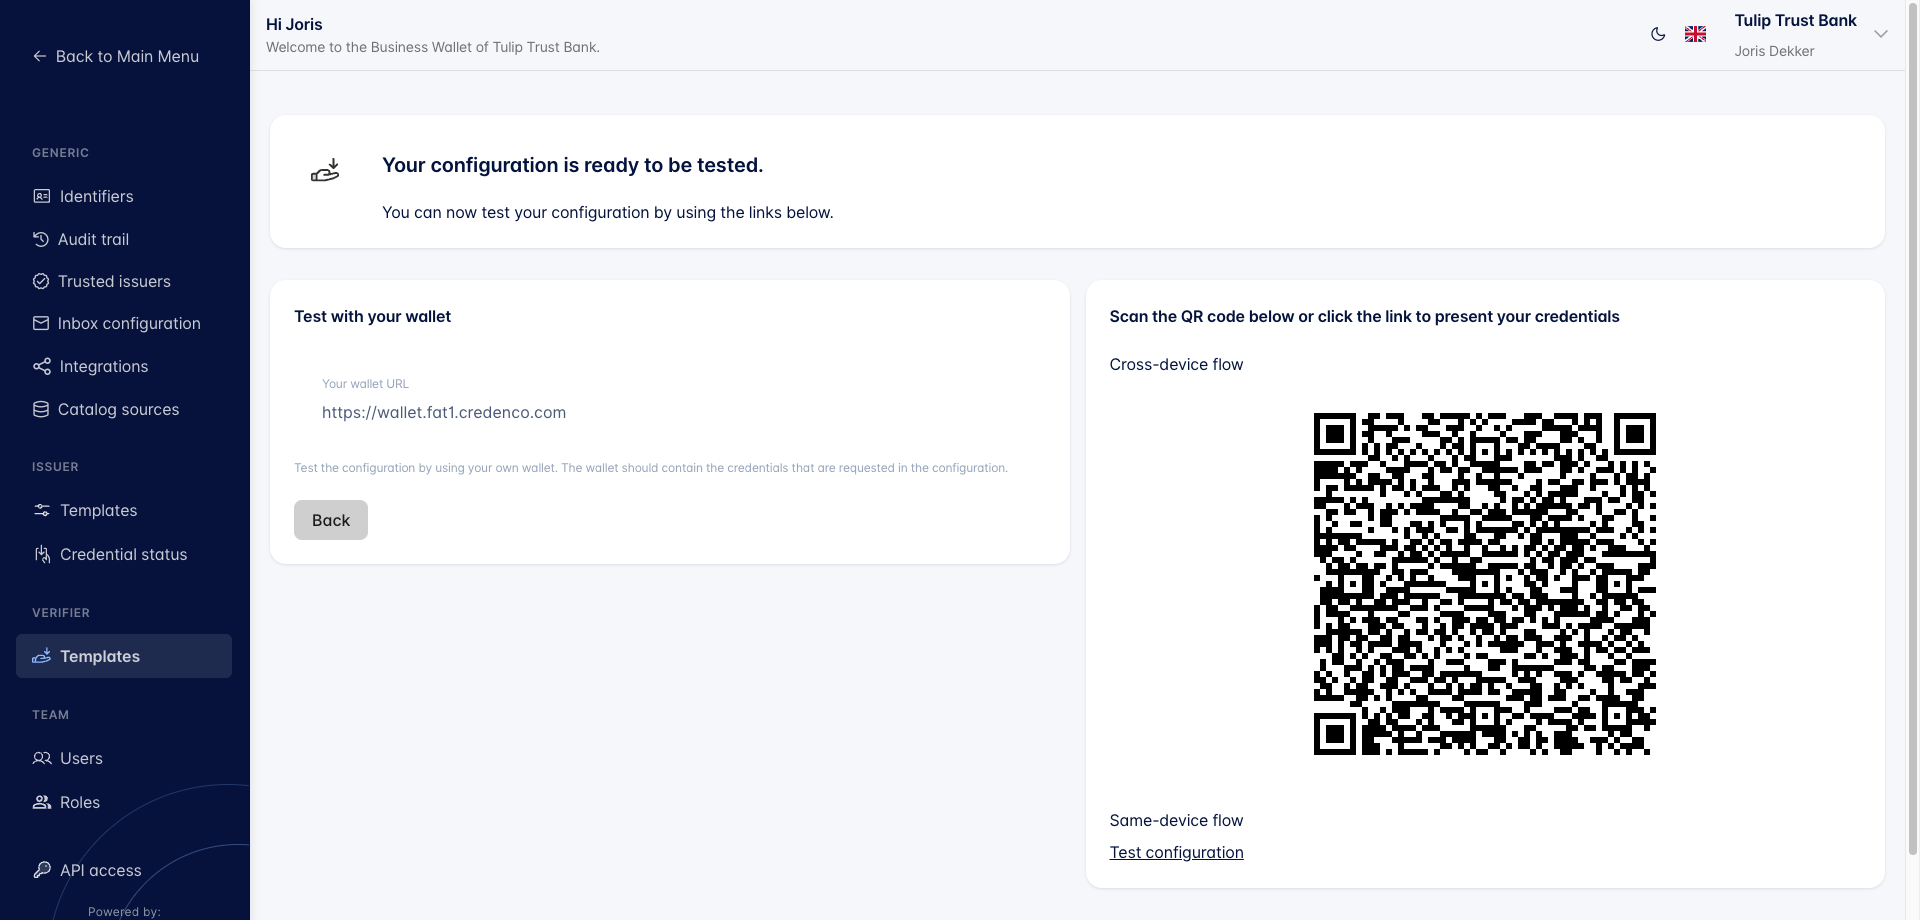
The test screen offers two ways to present credentials:
- Cross-device flow: scan the QR code with a wallet on another device, typically a phone.
- Same-device flow: click Test configuration to open the request in a wallet on this device.
Your wallet URL controls which wallet the request is sent to. It defaults to the wallet you are signed in to. That wallet must actually hold the credentials your template asks for, otherwise there is nothing to present.
Present the credentials
The wallet shows a consent screen listing every credential it holds that matches the template.
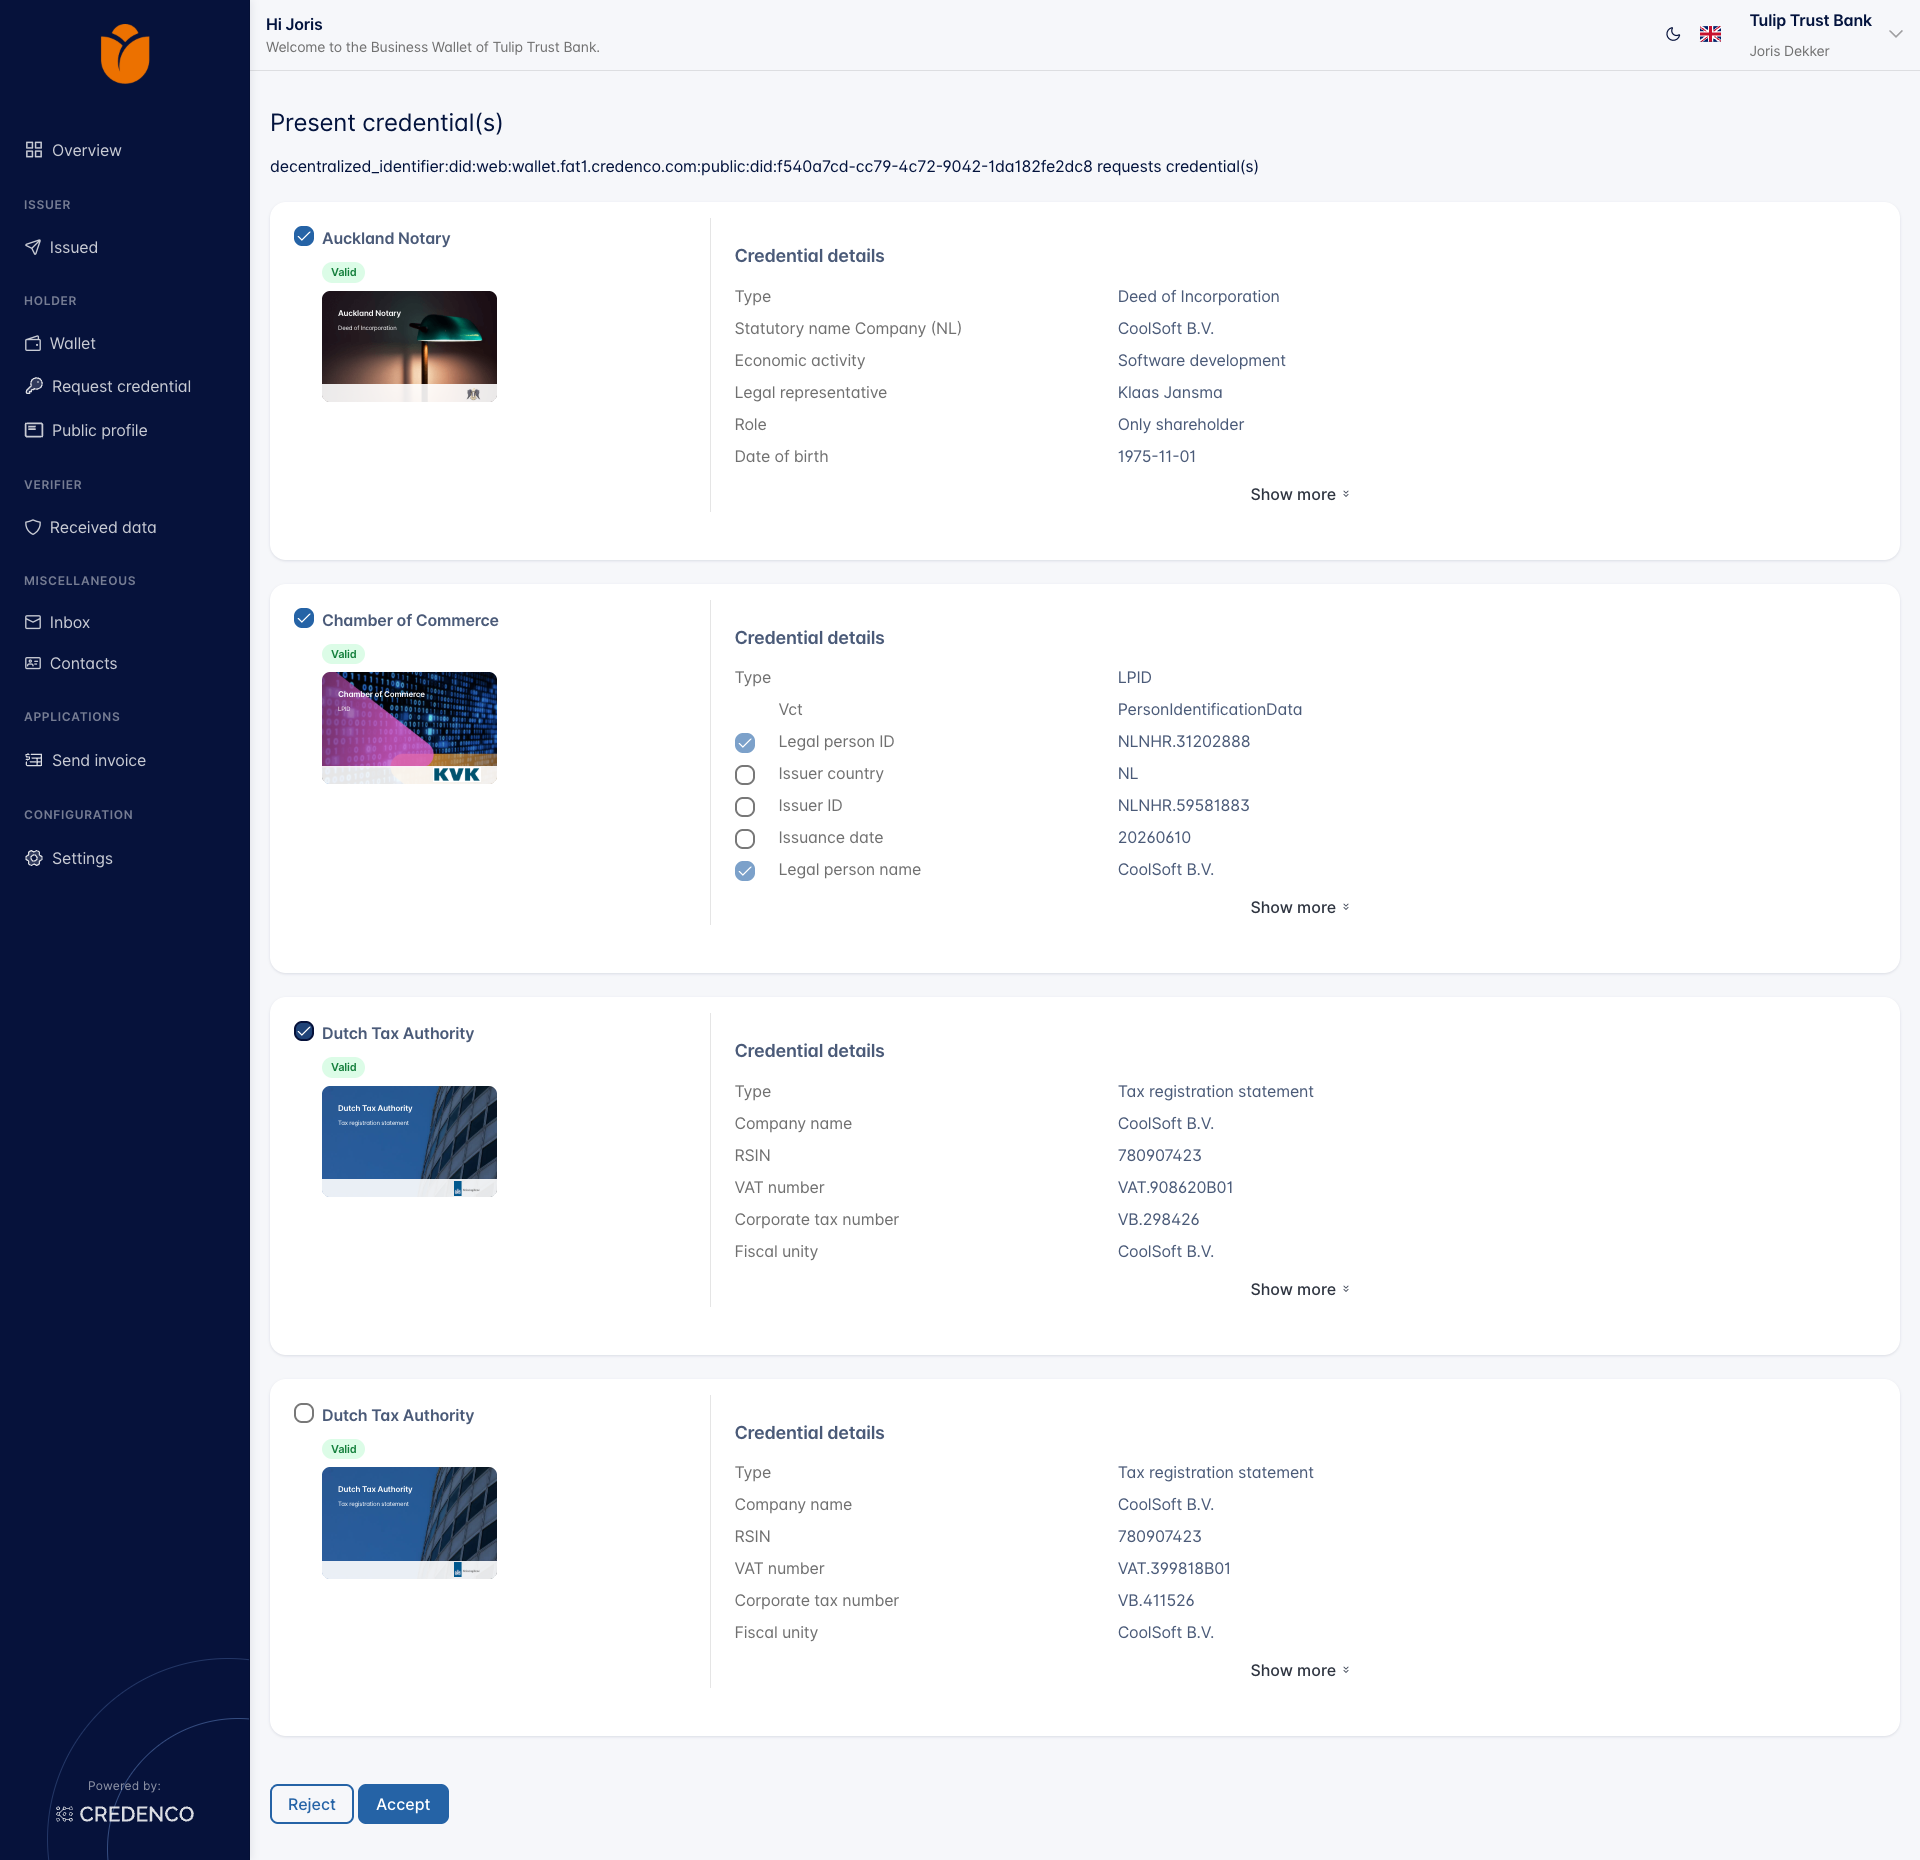
Each card shows the issuer, a Valid badge, and the credential details. Tick the credential(s) you want to present, then click Accept. Accept stays disabled until you select at least one credential.
For credentials that support selective disclosure, the individual attributes have their own checkboxes. The attributes your template marked as requested are pre-selected and locked; the rest are optional and you can add them. Use Show more to see the remaining attributes.
Click Reject to refuse the request instead.
Read the result
After accepting, the test screen reports the outcome.
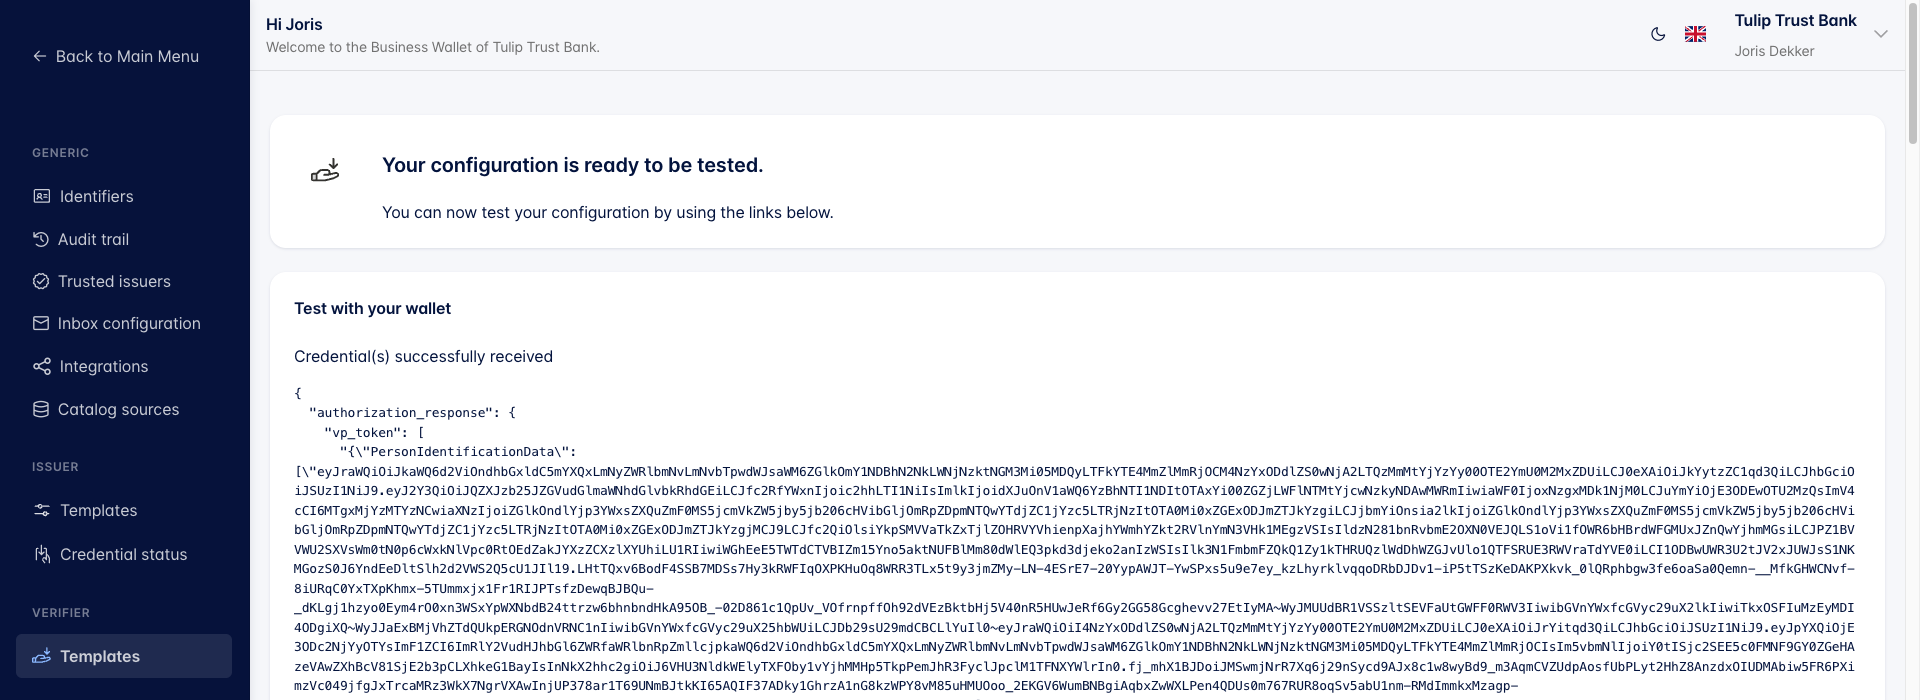
Credential(s) successfully received means the presentation passed every policy you enabled. Below the message the full authorization_response is shown, including the raw vp_token and the decoded credential_claims. This is the same payload your own backend receives from the Universal OIDC4VP API, so it is a good way to check which attribute names and values you will actually get.
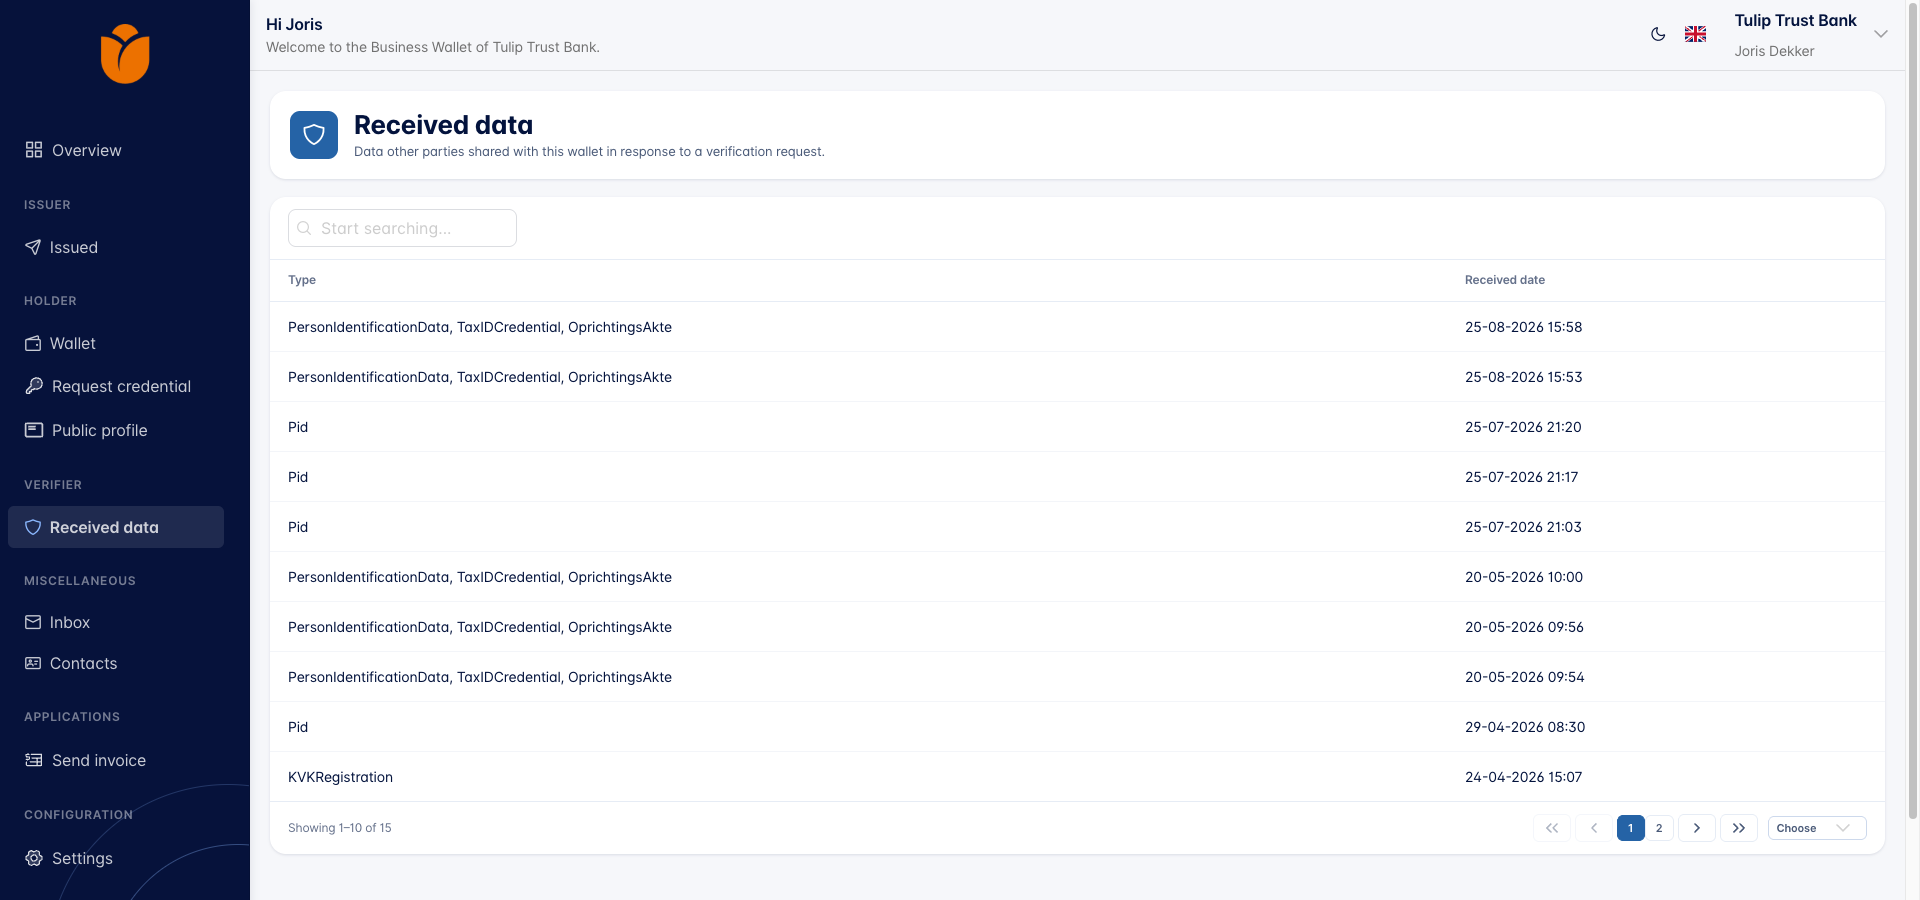
A test run is a real verification. The result is stored like any other, under Verifier → Received data.
Testing does not use your Success URL or Error URL. Those apply only when a verification is started from your own application.
You need the Verifier templates (Change) permission to create, edit, or delete verifier templates.